The development of an n-scale train layout in a fictitious southern Pennsylvania county.
Saturday, July 18, 2015
July 18th, 2015: The Mountain Takes Shape! (PART 2)
Next, the road had to be shaped and covered in gypsum. The hot wire routing table was used to accomplish the shaping of the foam and setting of the grade of the roadway.
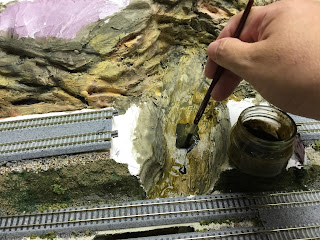
The foam, once in place, had to have the lower waterfall area carved into it.
The newly carved foam areas were covered with gypsum and then painted.
Silicone was used to create the lower falls and stream. It was covered in clear polycrylic but it developed a weird yellow color to it so it had to be painted to cover it up.
Next up is finishing the slaughterhouse which will go in the lower right area in the above photo:
And then the mountain has to be covered in greenery and trees. Once that is done, the roadway will be finished and the bridges put in place...and the main part of the layout will be completed.
July 18th, 2015: The Mountain Takes Shape! (PART 1)
It's been a very busy couple of months. After finishing the town we started working on the mountain. It was just two platforms with foam on them, so we had to give it elevation, topography and, most importantly, a waterfall. The waterfall was something we knew we wanted on the layout since its inception and the hour was at hand to make it.
The mountain had additional 2" foam added to it and then was carved to include a stream that flowed to where the waterfall was to be. Landscaping is being added to it to give it a base for the trees that will go in later.
One of the other issues we had to deal with was connecting the roads from the west side of the layout to the manufacturing area on the north side. In order to make this work, we had to engineer bridge crossings over a track and over the stream in front of the waterfall, where the covered bridge will eventually go. This required a great deal of foam to build some of the areas up six inches higher or more from the last bare areas of homasote. The bridge in the above photo was designed on a simple web-based CAD program (Tinkercad) and then sent to Shapeways to make out of 3D-printed plastic.
The waterfall was made from clear silicone caulk streaked with glass fiber "angel hair". The caulk was laid onto a piece of wax paper and spread out with a metal painter's spatula, angel hair placed on top and then a second layer of silicone spread on top of it. The spatula was used to etch texture into the silicone before it dried.
Subscribe to:
Comments (Atom)


