Saturday, April 30, 2016

April 30th, 2016: Nearly Done!!!

Well, the last few months have been a little slow as we approach the end of the build.  We've spent our time in the peninsula, putting in the road and the buildings.  The last tunnel had to be built as well, a removable cover made necessary by the tunnel length.  It's by far the longest covered tunnel outside of the mountain.


The tunnel is on the left of the two tracks on the right side of the photo.  It needs a lot of work to make it blend in properly with the surrounding hillside.


Here the stockyard sits, the last area that needs to be finished in the main part of the layout.  The stockyard was destroyed by a cat but repairs were possible.  It may not be pretty but it works.
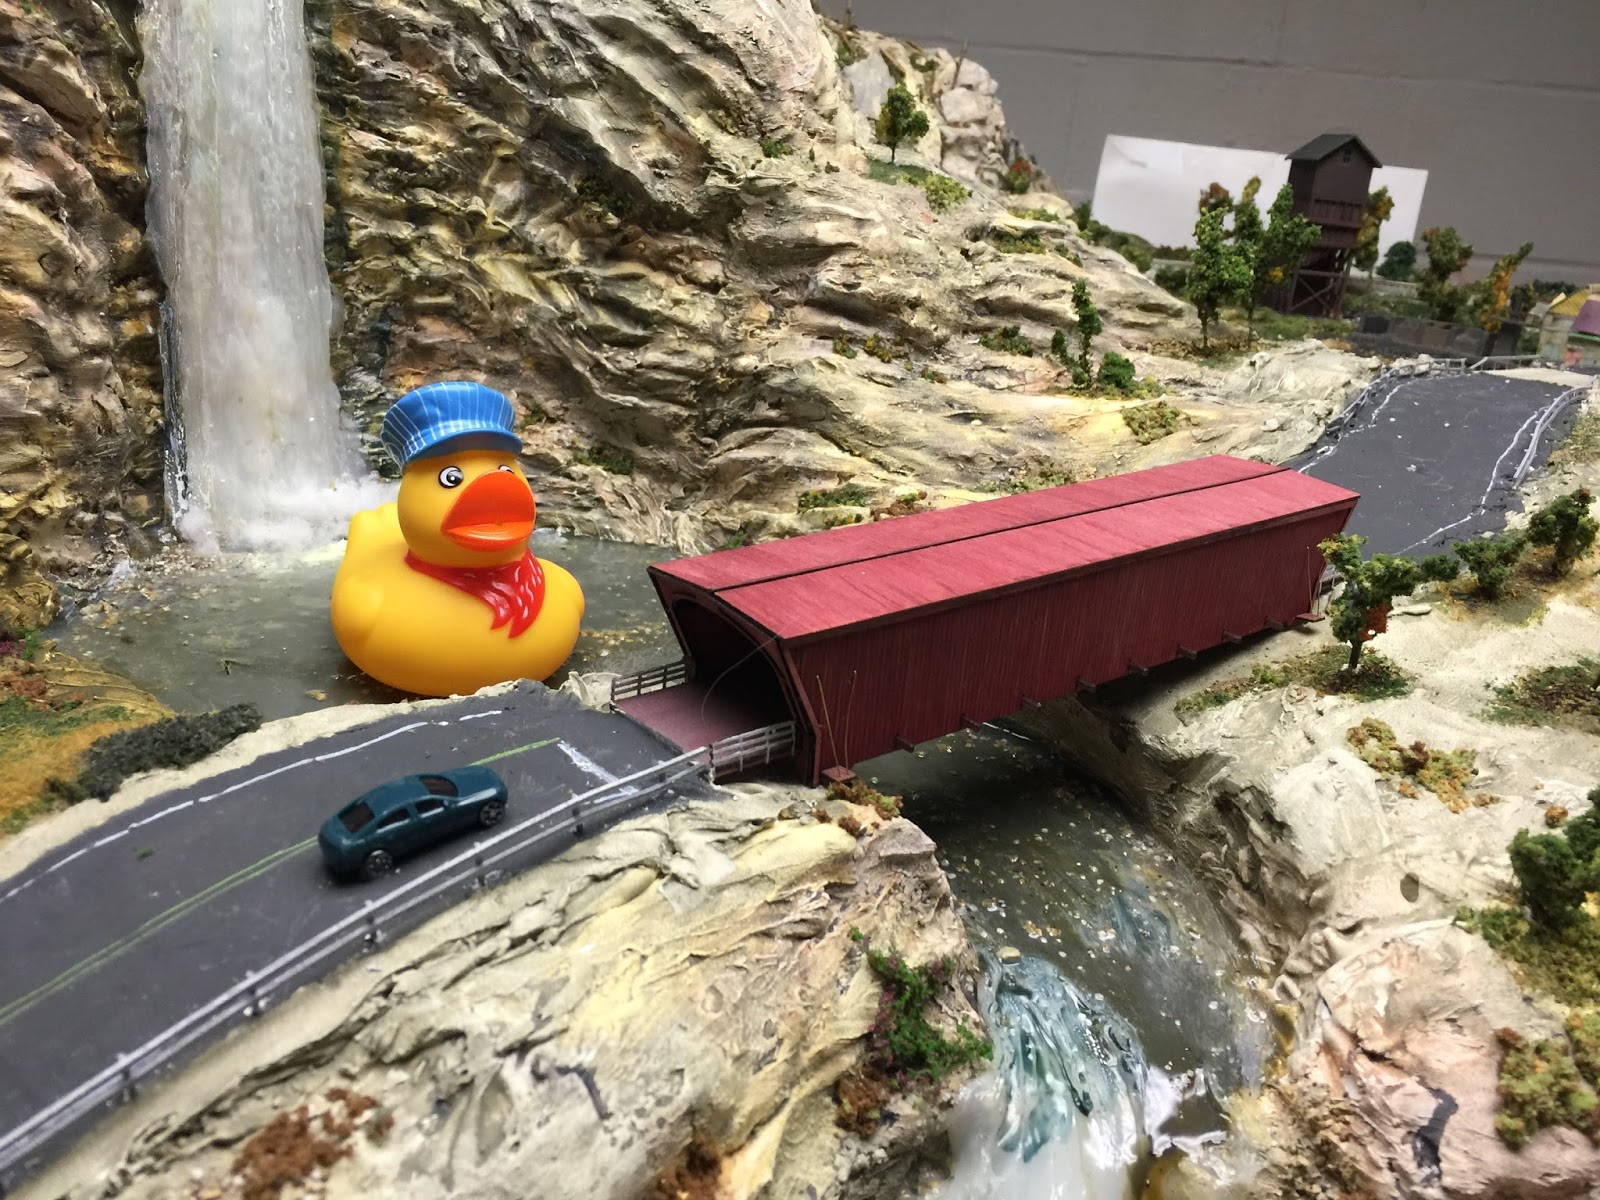


A giant rubber ducky oversees the covered bridge while enjoying a bath in the waterfall's pool.

Our next phase is to redo the wiring.  There are some wires that are not connected to anything and a few dead areas of the layout.  Are these problems related?  That will be revealed in a future edition of Mina County Railroad!


Wednesday, November 11, 2015

More images from Mina County!!!

Been playing with Topaz ReMask to place actual photos behind the layout to strategically make it look realistic.  The layout design has been on hiatus as we have been concentrating on putting the fence up around the layout so that the cats can once again roam free in the basement without the Godzilla Effect.

Here is the camp at the top of the mountain at sunset.  Background:  sunset over the Catskills in the spring.
 The farmstead.  Background:  The Trapps along the Shawangunk Ridge.
 The tunnel under the mountain's peninsula.  Background:  just some random sky.
 The town at sunset.  Background:  Woodcock Mountain in Washingtonville.

Wednesday, October 28, 2015

October 28th, 2015: Topaz ReMask

So, I discovered a great new tool for making photos of the layout, called Topaz ReMask.  I can cut out cleanly the basement and add a background photo to make things look more real.  These are three old iPhone photos of the layout, remade using this technique.  Now I have to start using my real camera more often!!!


Tuesday, October 20, 2015

The River Is Done...On To The...Fence???

So, the river is complete.  Took a large number of coats of Polycrylic to get it done and some small stones as well but it is done!  Hallelujah!

Here is the view at the top of the mountain with the rock-strewn stream leading off...

And the covered bridge is now in place, held there by the gypsum spread with a pallette knife to bring the road up to the level needed to cross the bridge.  We will be placing traffic lights on either side as this is a one-lane bridge.

Next up are the portals and cliffs on the 4X3 peninsula.  Why are we working there?  Because of the need to put up a fence around the layout so my dad can start letting the cats downstairs again without fear that they will Godzilla the layout.

The cliff (the last one on the layout!) has been carved, gypsumed and painted and the portals are in place.  The ballast has been glued down and texturing put in place.  Now we will ignore this area for a while, we got enough done so we could get the fence up.

We put posts up and an overhead beam to hand an 8' section of fence from.  We are doing this all around the layout.  We just need to make sure the cats can't get onto the layout.  They've done it before.  A tornado would have done less damage.  :)


So, the build goes on!

Monday, September 14, 2015

September 14th, 2015: The Mountain Consumes All

We have been spending all of our time on dressing the mountain.  The silicone river did not work out so we tore it out (came out mostly in one piece) and carved it deeper, painted it with gypsum and then Woodland Scenics paints and then used tinted acrylic lacquer to fill it in.  We are still not happy with how it looks, it is going to take a bit to overcome the mistakes that were made but it should come out all right in the end.

In the meantime, work continues on the top of the mountain.  Lots of texturing is being placed, even some of the hydrocal rocks we molded two years ago but never used are being placed on top.

We are also placing a modular fence around the layout to prevent the cats (who are, for the time being, banished from the basement) from jumping on top and playing Catzilla.  We have experimented with placing posts with fencing permanently in places we can easily reach around to work on the layout and access trains and then connect them with removable fence sections.  Before we can go any further, we have to finish the area on the peninsula that the trains come out on.  Once that's done, the rest of the fence should go up relatively quickly.


Saturday, July 18, 2015

July 18th, 2015: The Layout As It Stands So Far


July 18th, 2015: The Mountain Takes Shape! (PART 2)


Next, the road had to be shaped and covered in gypsum.  The hot wire routing table was used to accomplish the shaping of the foam and setting of the grade of the roadway.


The foam, once in place, had to have the lower waterfall area carved into it. 


The newly carved foam areas were covered with gypsum and then painted.


Silicone was used to create the lower falls and stream.  It was covered in clear polycrylic but it developed a weird yellow color to it so it had to be painted to cover it up.


Next up is finishing the slaughterhouse which will go in the lower right area in the above photo:


And then the mountain has to be covered in greenery and trees.  Once that is done, the roadway will be finished and the bridges put in place...and the main part of the layout will be completed.